
How to set up a VideoCoin Worker
VideoCoin Workers accept video workloads from the VideoCoin Network, processes and submits it back to the network. This worker is available as a convenient Docker Image that can run on Windows.
Create an account on VideoCoin Console
You can sign up here https://console.videocoin.network/sign-up
Navigate to the worker tab
Log in and click on the worker section
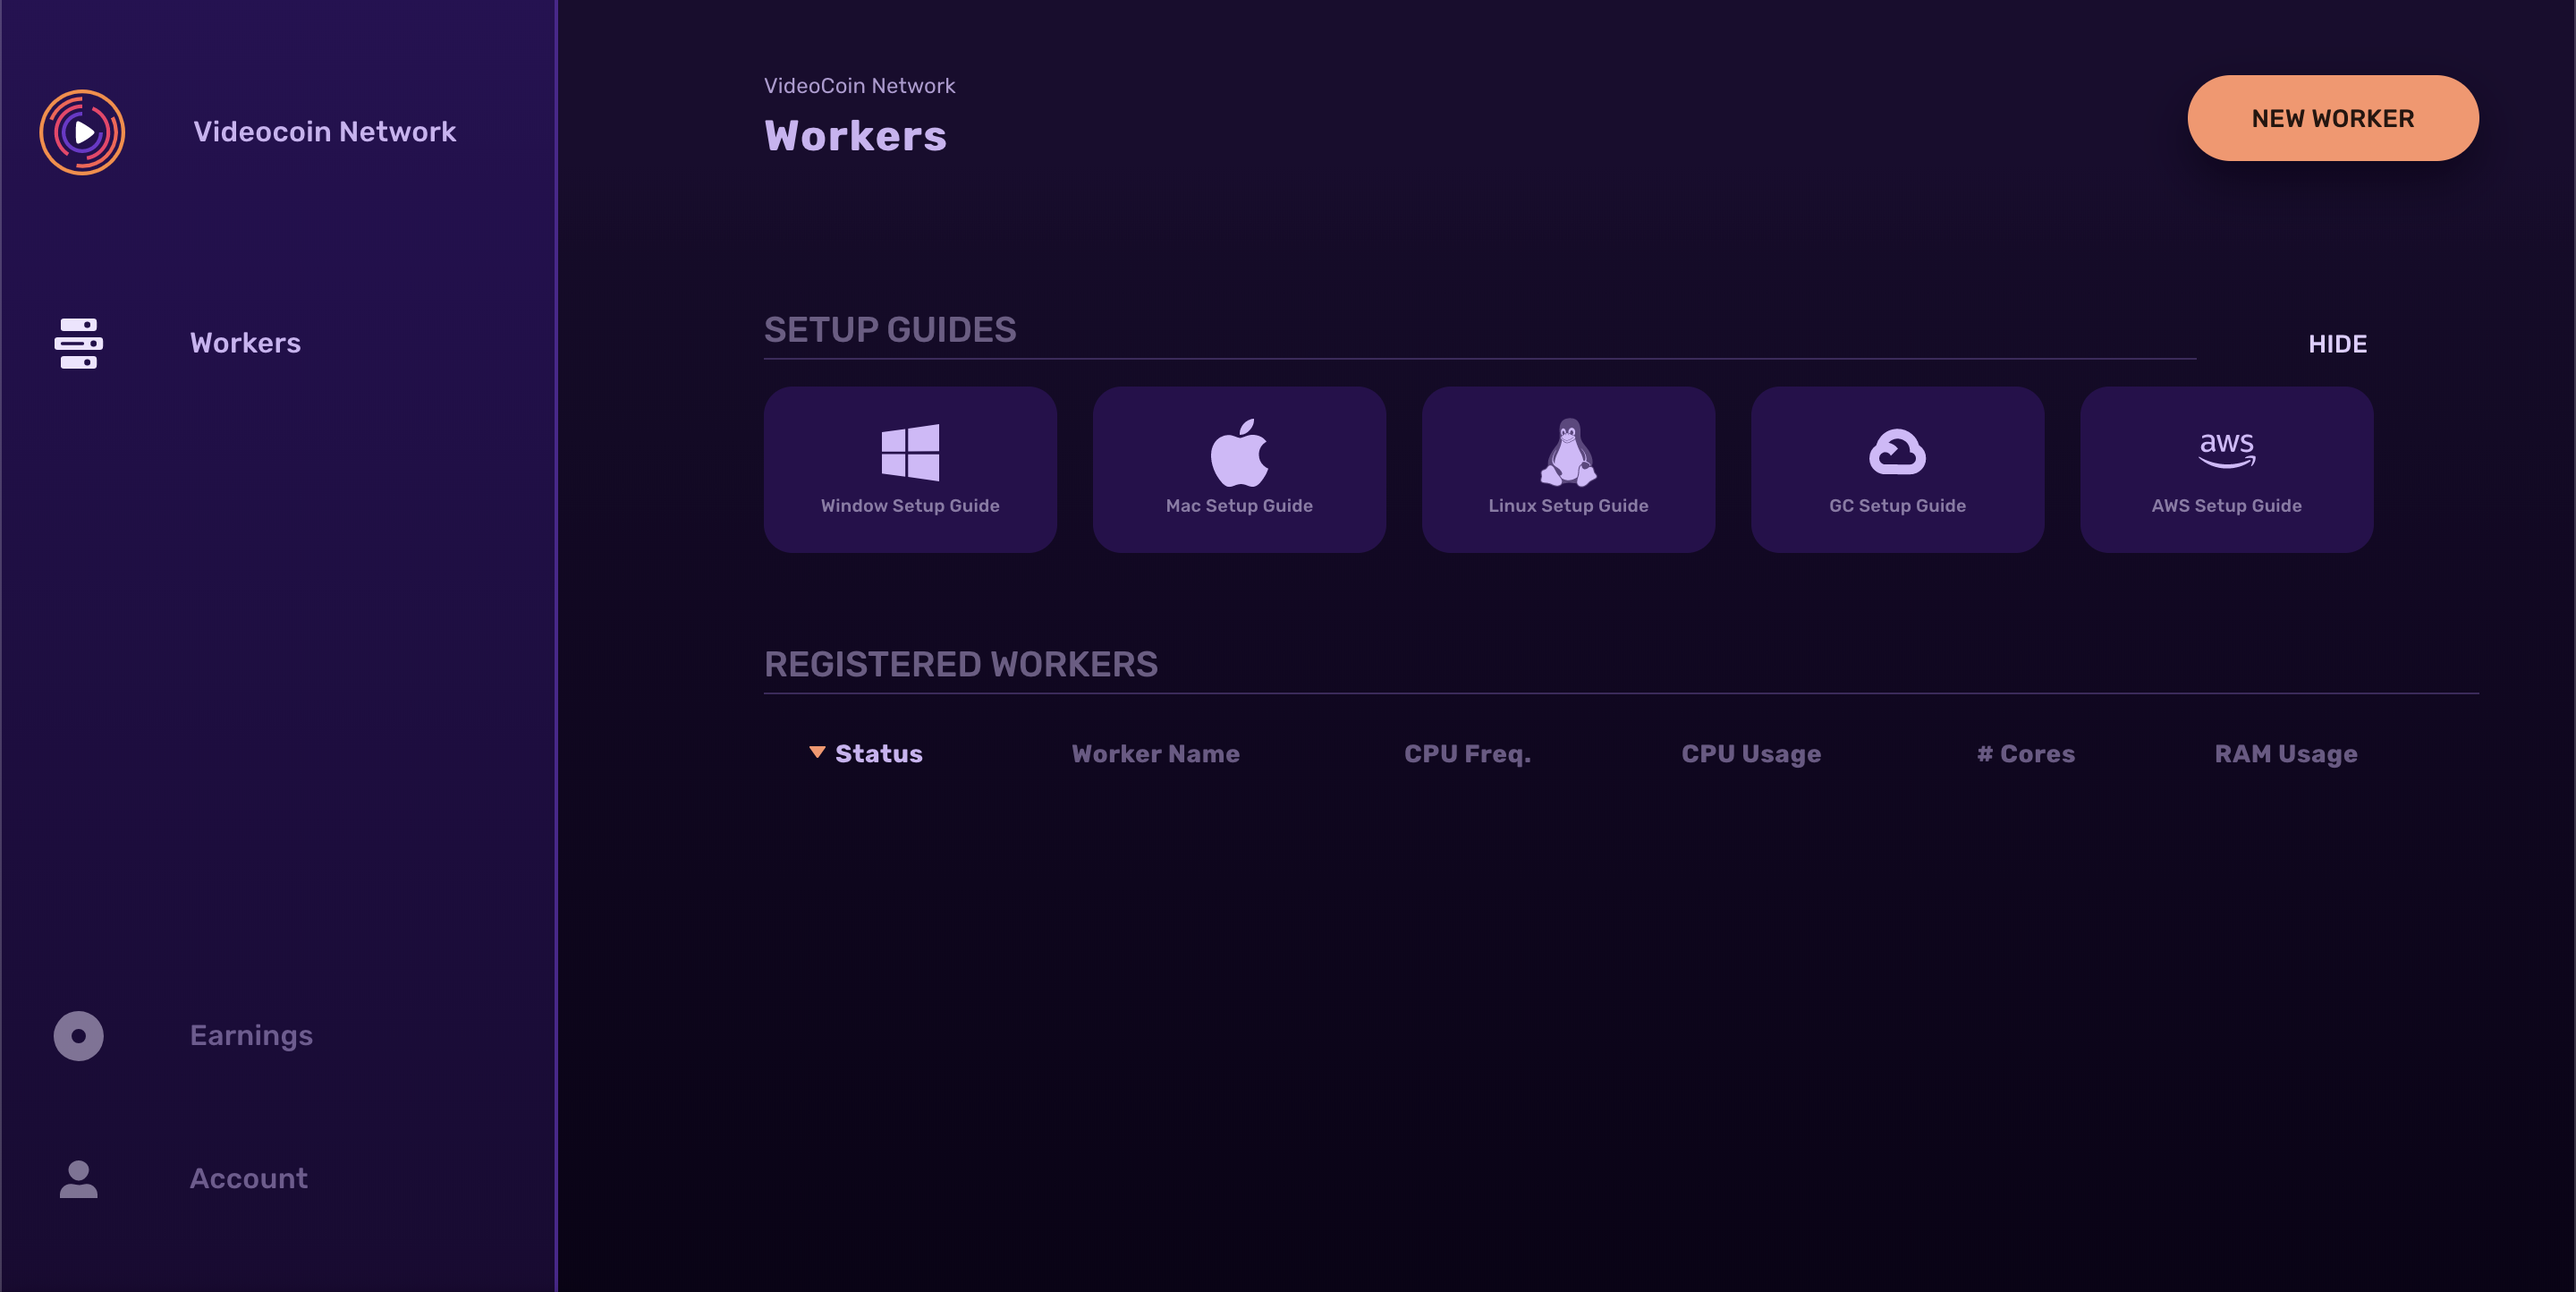
Add a New Worker
Click on “New Worker” and an automatically named worker is created for you, along with a unique worker ID
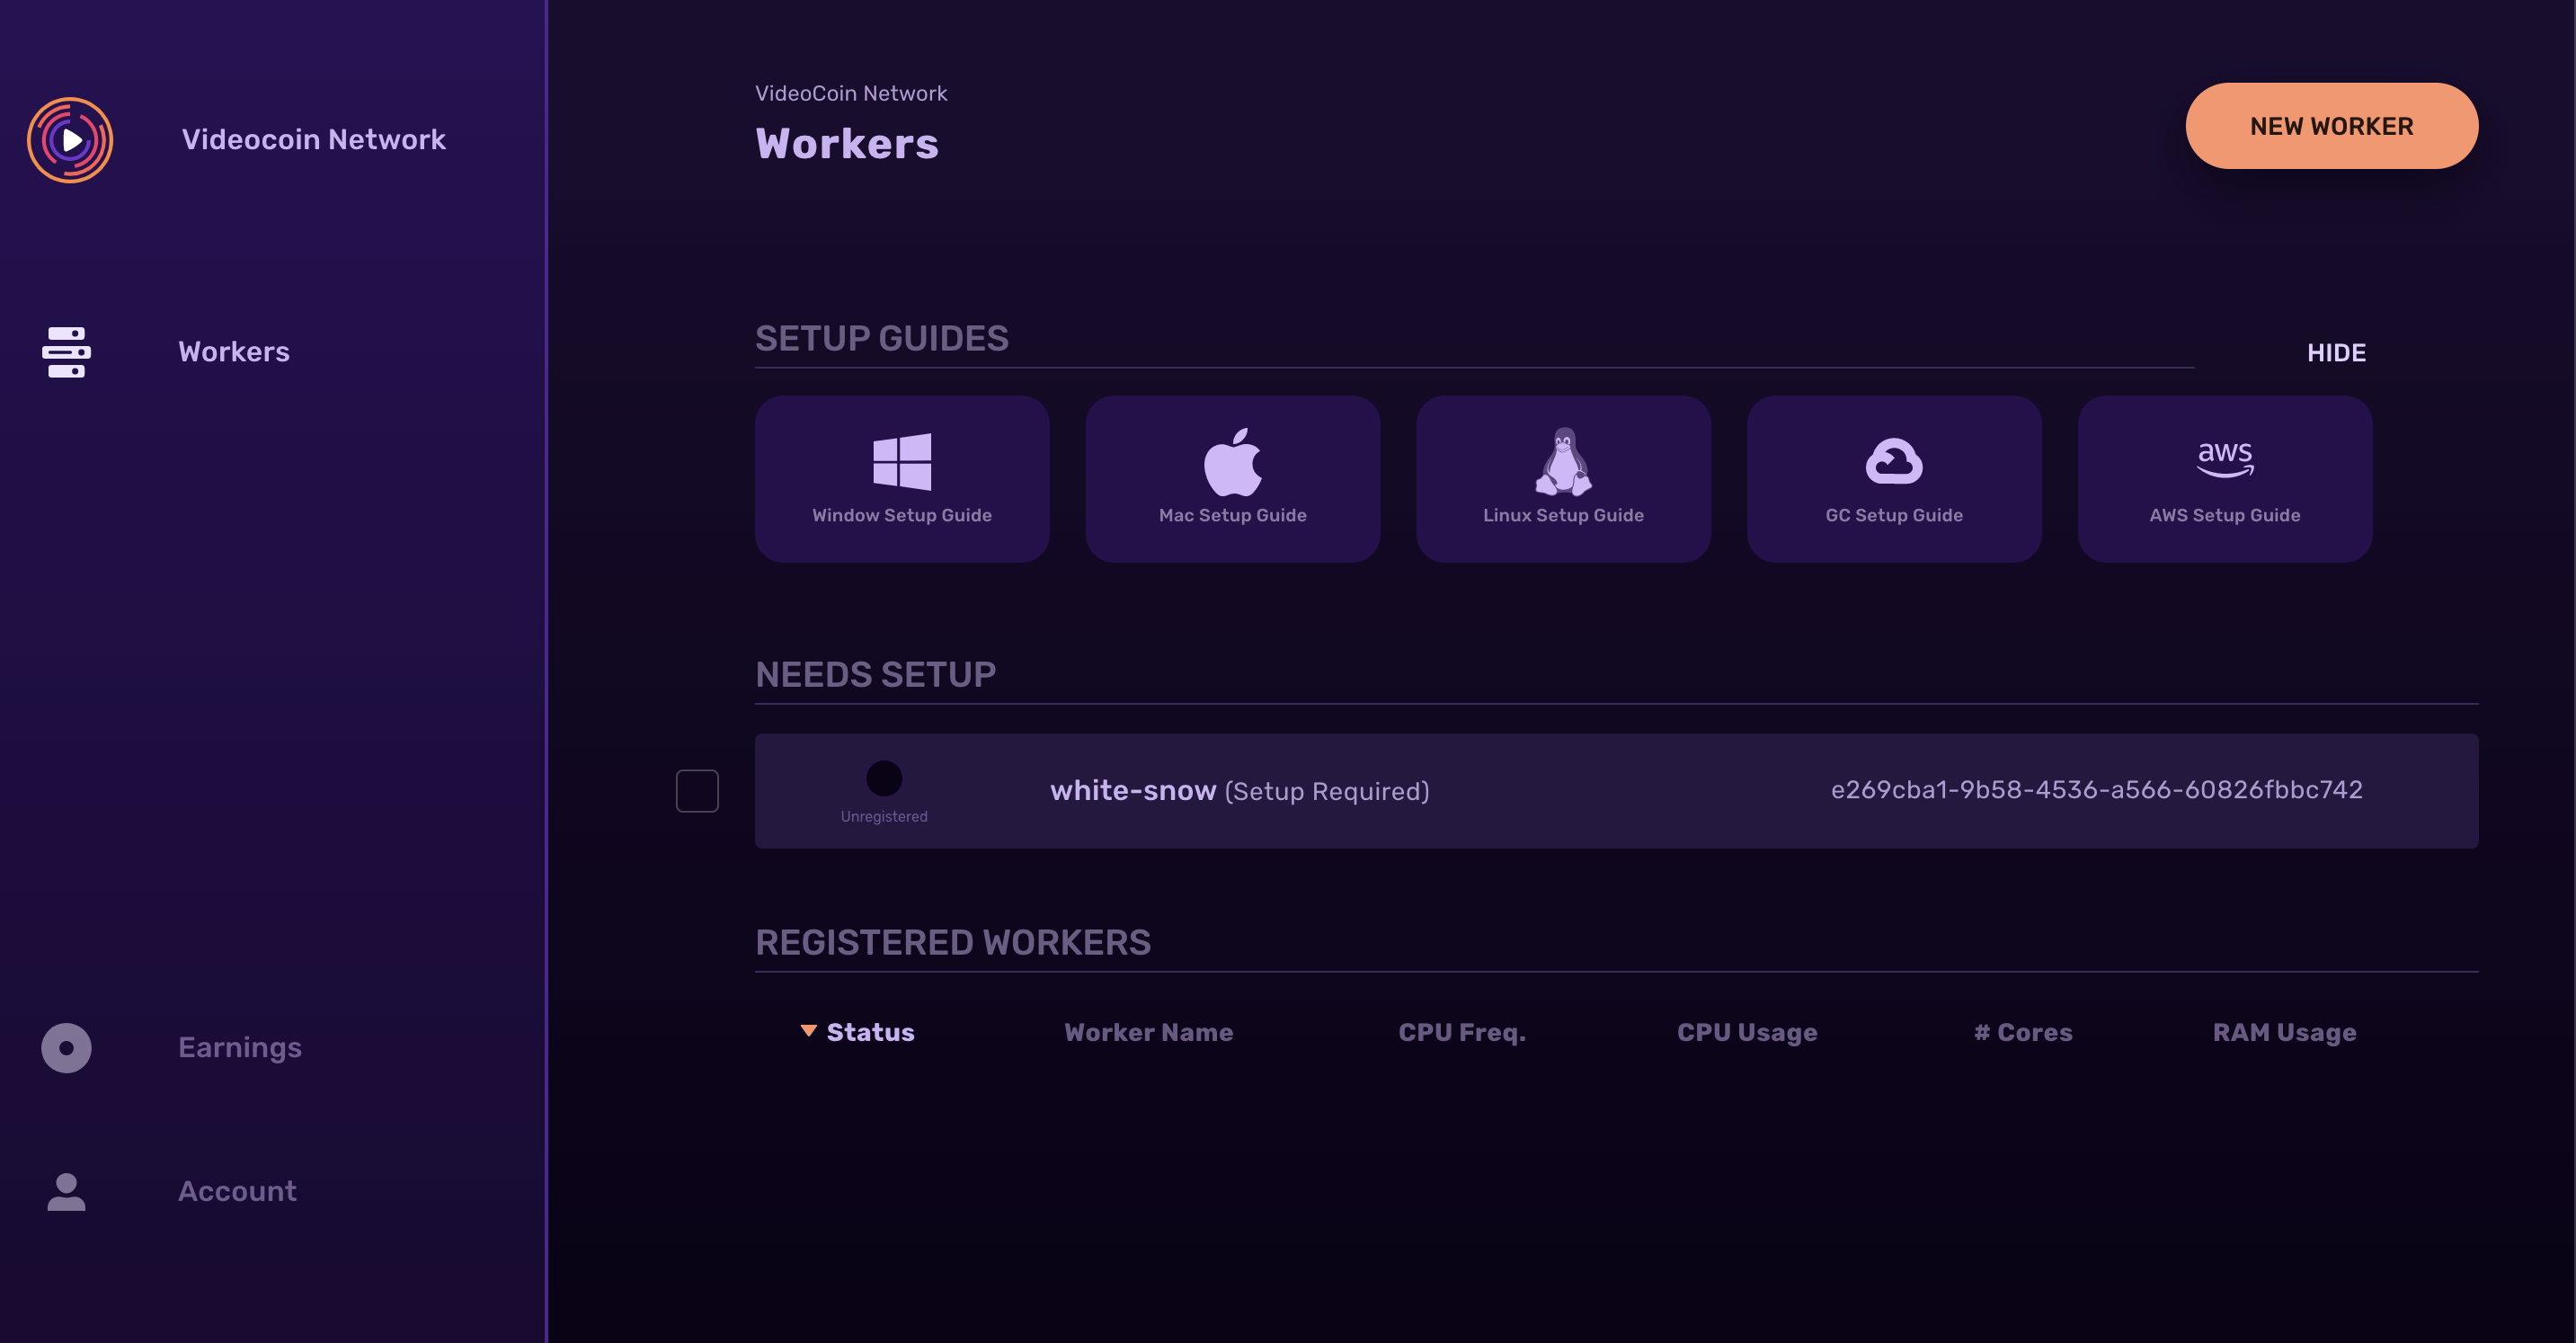
Click through on the worker name and you can now see the client ID

Save this client ID
Setting up Docker
Click here to learn how to set up Docker on Windows.
Get the VideoCoin Worker Docker image
You can find the Docker image here.
docker pull videocoinnetwork/worker
Generating a Key
VideoCoin Wallet is compatible with Ethereum, so you can use a standard wallet create a tool like
ethkey generate
Once you have the key, fund the account with ERC-20 VID Tokens to this account on Ethereum Mainnet. You may have to transfer tokens equal to self-stake and some additional tokens to cover transaction fees/gas on the VideoCoin network. For example 50000 VID tokens as required for the current minimum self-stake plus 10 tokens to cover worker transactions.
You also need to fund this account with some Ethereum (for example ~0.1 ETH) for transaction fee on Ethereum Mainnet. This is required to transfer VID tokens between Etherem Mainnet and VideoCoin network.
You can use the worker self-staking tool described in the following document.
Look at the following link for the minimum self-stake required, approval wait periods to run the worker
The VideoCoin Network is a powerful API-first, decentralized video platform that utilizes untapped computing resources to save you money.
Create a Configuration File
KEY={"address":"799d259411ed9355e403e91398c0855bb5272117","crypto":{"cipher":"aes-128-ctr","ciphertext":"84810fe84b4fbc24228884a6a08119472e14f7afb0944ee57141ab52c2c6f815","cipherparams":{"iv":"77feb1d4fb24ee317dfbf90d9e785e6e"},"kdf":"scrypt","kdfparams":{"dklen":32,"n":262144,"p":1,"r":8,"salt":"c20e7612270c99bcfae8938801832134315c16a8563f2d544f7cd86a9e3b472f"},"mac":"2d4f061e9494b2dd4f555892e28f4aae49a289250e05fdd087333747c395da6f"},"id":"6b639617-620c-4d9b-a68b-eae68cd2870a","version":3}

SECRET=741839f346d6e8126ae38ee76a96fd12

CLIENT_ID=<Your_Client_ID>
Please use a text editor to create the configuration file.
The text that appears after “KEY=” is the content of the key-file created in the section “Generating a Key”.
The text that appears after “SECRET=” is the same as the password created in the section “Generating a Key”.
The text that appears after “CLIENT_ID=” is the client ID obtained in section “Add a New Worker”
Save it into a file called vars.env
Your keyfile and secret are used locally on the worker to sign transactions.
Run the worker
docker run --rm --env-file vars.env videocoinnetwork/worker:latest
That’s it! Your worker will now be waiting to receive work