
This tutorial shows how to configure OBS Studio to stream over VideoCoin network.
The OBS Studio can be used to capture desktop-screen or camera stream and convert to H.264 video format using FFMPEG. Follow the link for installation instructions: https://obsproject.com/wiki/install-instructions.
Below are simple steps to start using OBS Studio with VideoCoin network.
Create a new stream in VideoCoin publisher studio and obtain ingest RTMP URL and stream Key.
-
Log into the VideoCoin Publisher Studio [https://studio.videocoin.network/sign-in]
-
Click “Streams -> New Stream”
-
Select Input: RTMP
-
Select Output: HLS
-
Select Profile - Choose your preferred output resolution for the livestream
-
Click Create Stream
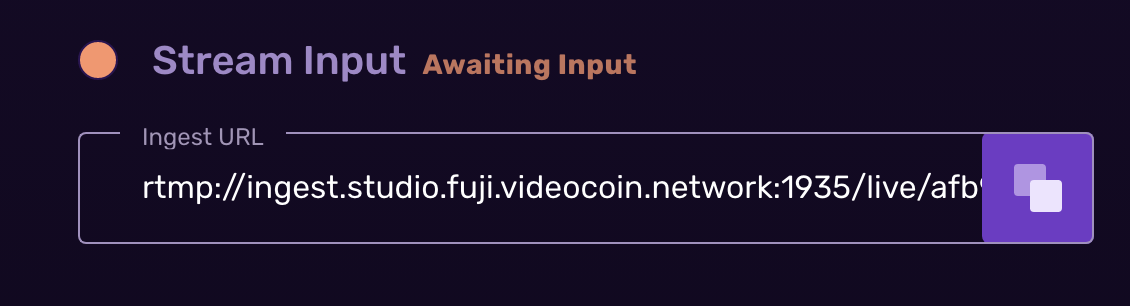
Copy the RTMP URL and stream key (shown on the screen shot below)

Configure OBS Studio
Configure the OBS Studio stream parameters and specify the RTMP URL and stream key obtained from the previous step (as shown in the following screen). Please note that the RTMP stream key at the end of Ingest URL (after ‘/live/’) needs to be removed and copied to “Server” field. RTMP stream key alone needs to be copied to “Stream Key” field.

Start Streaming
Use the OBS studio controls on the main screen to start streaming.
View the Livestream
-
In the publisher studio, ingest status will change to “Receiving”
-
You can preview your stream on the livestream page
-
The URL in the ‘Output’ field can be shared with multiple people. This is equivalent to a YouTube live channel. You can also view the live stream in a browser or VLC Player.
-
Your live stream is successful when you see an output URL, a preview image and information starts getting displayed in “Protocol Events”
You now have successfully streamed your OBS stream over the VideoCoin Network.